Inspecting Flareless Fitting Assemblies

 Assembly instructions
- Use a tube cutter on the tubing to cut to length and ensure a clean, straight cut.
- Prepare the end of the tube with a deburring tool to ensure a surface free of burrs.
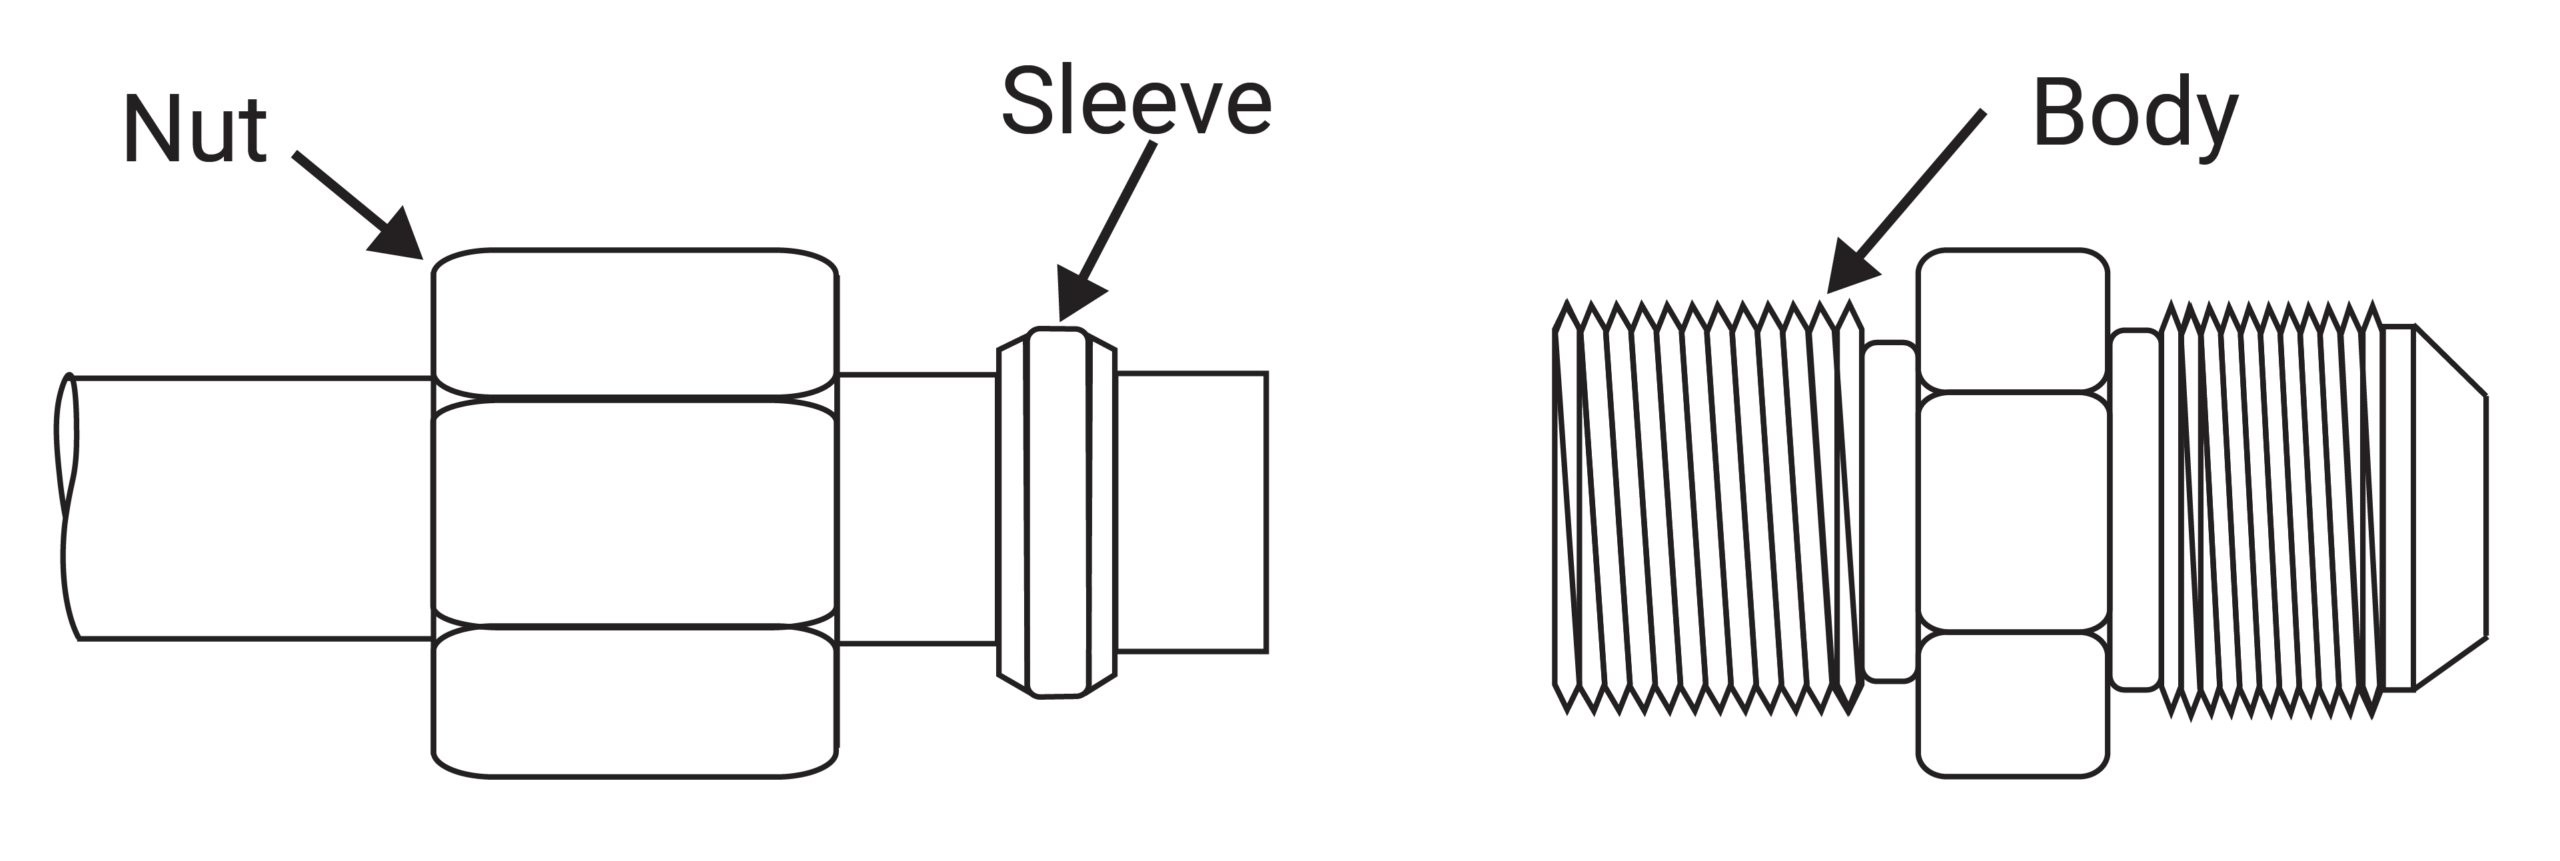
- Slide the nut and then the ferrule/sleeve onto the tube. The threaded end of the nut must face out.
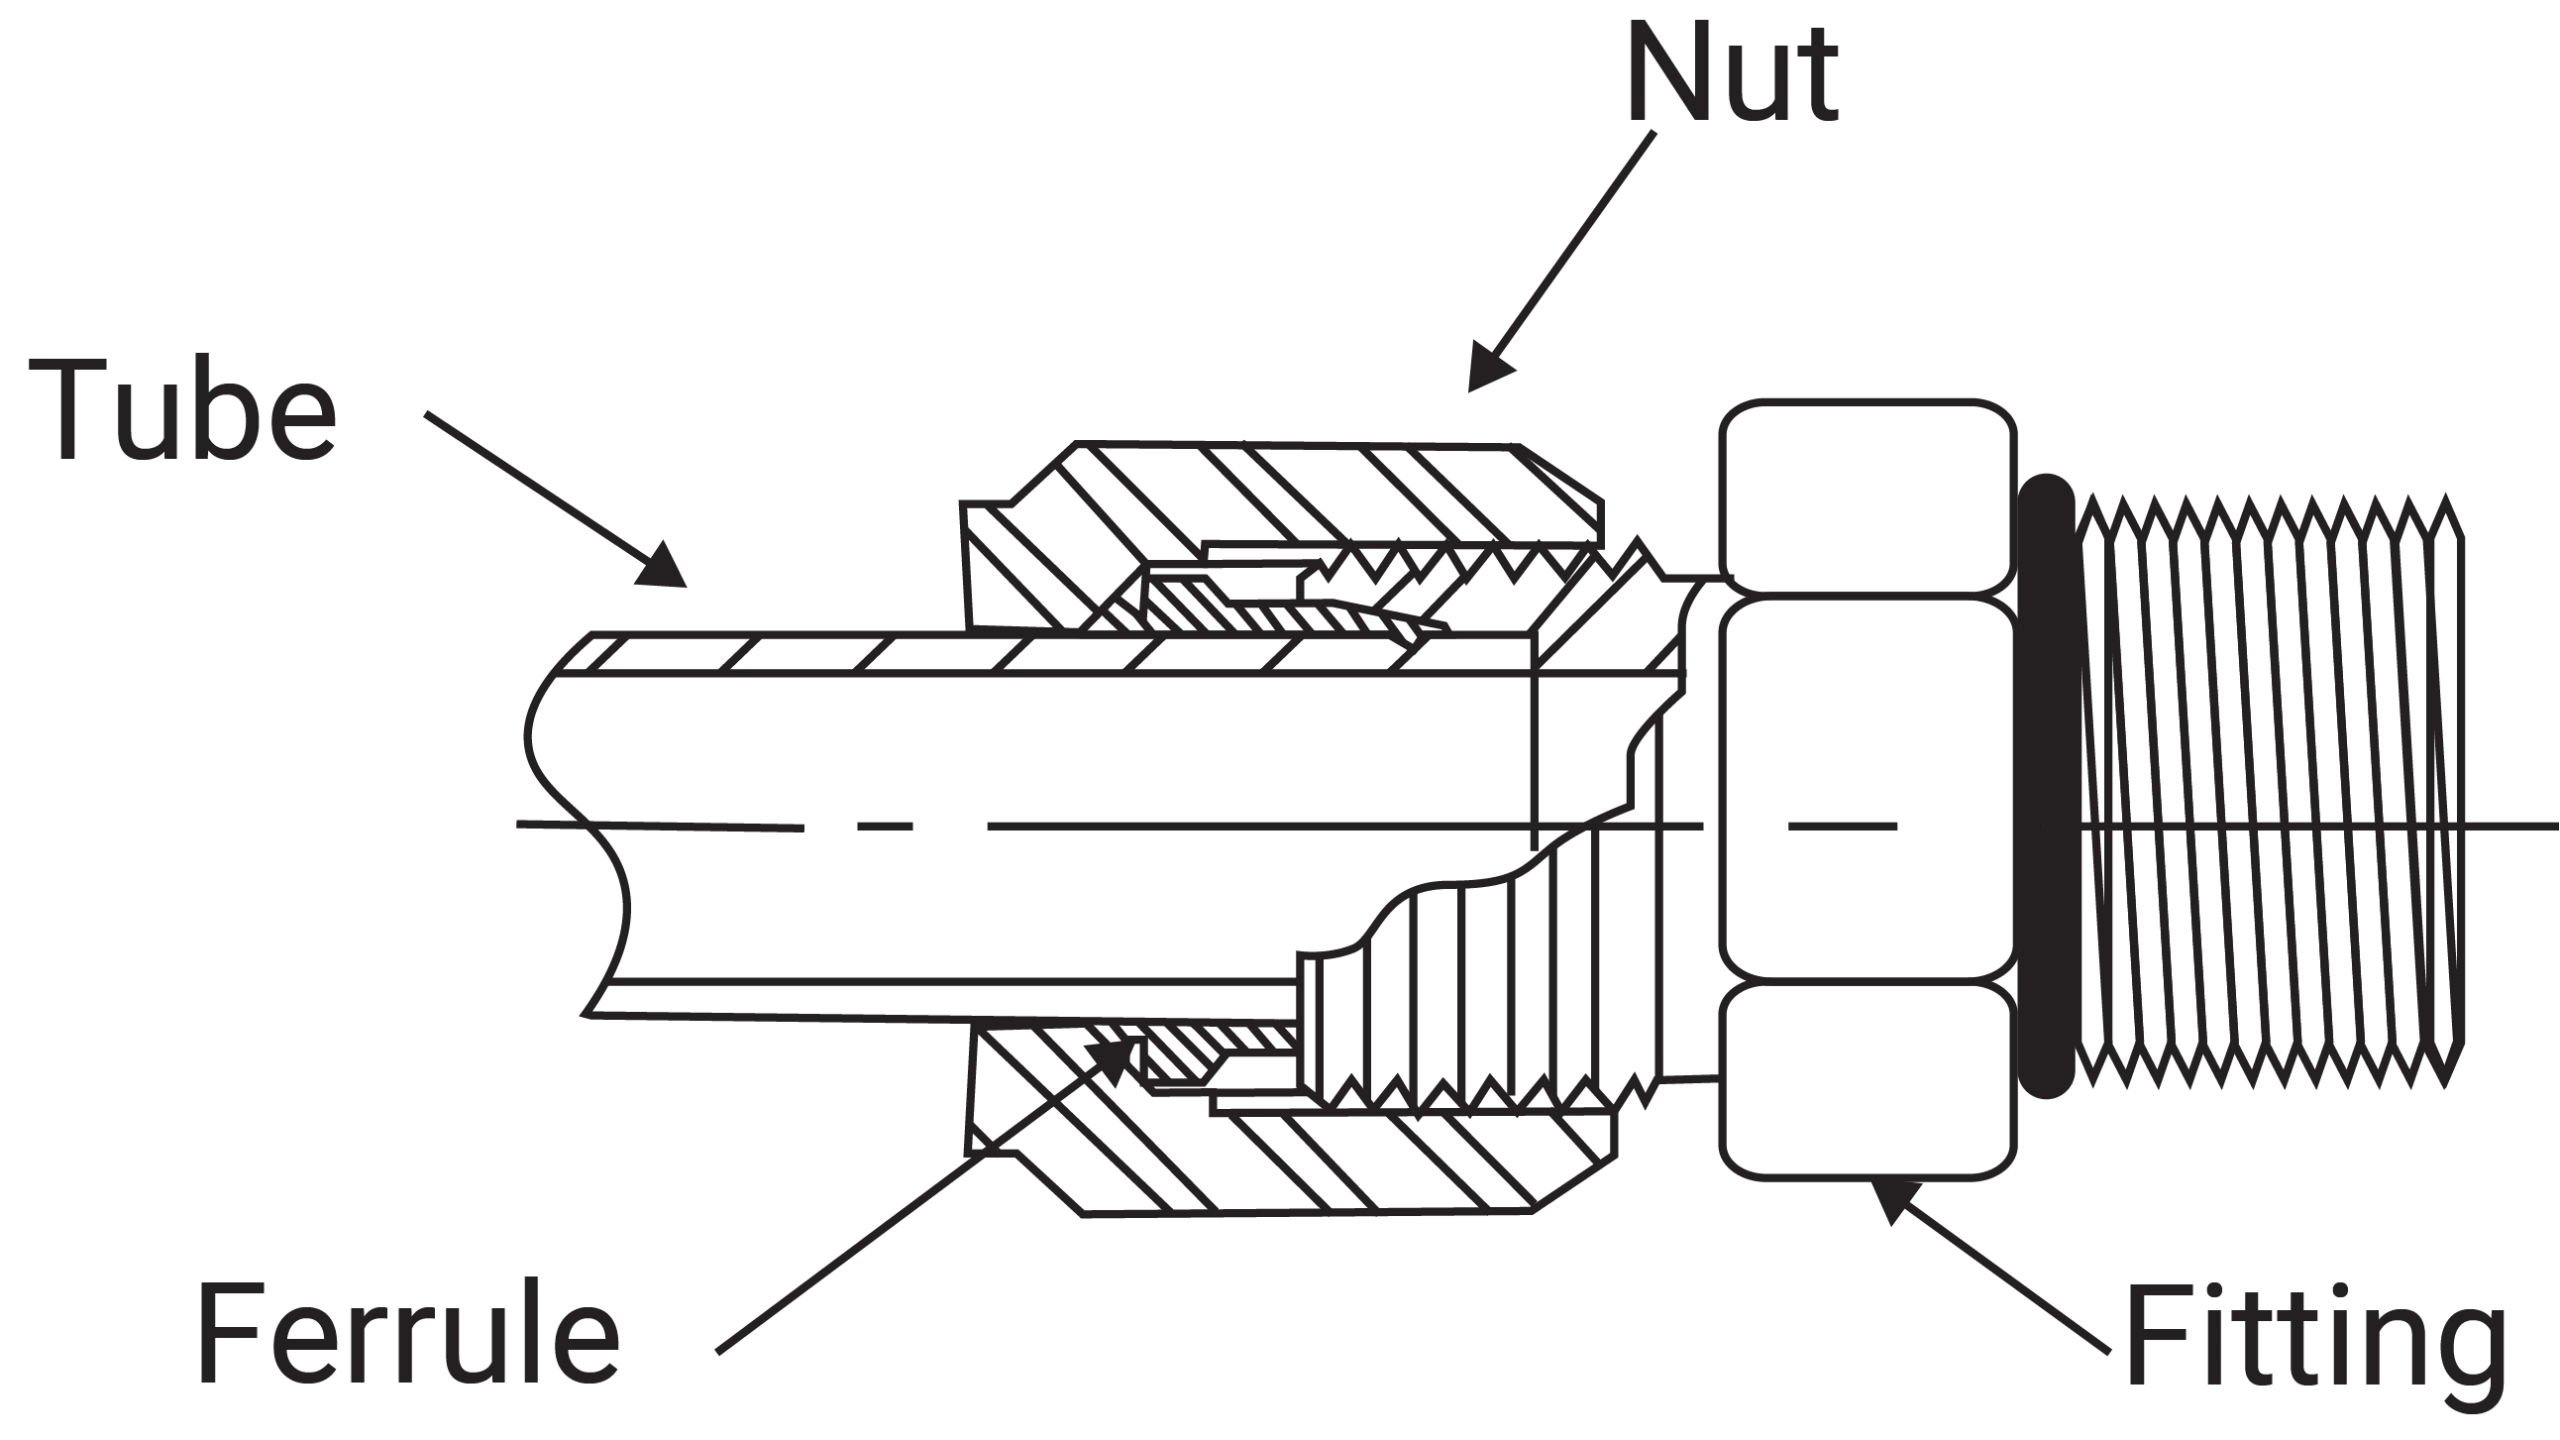
- Insert tubing into the fitting body, making sure the tube is bottomed out on the fitting shoulder.
- Assemble the nut to the body, hand-tight.
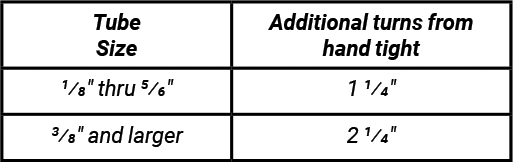
- Tighten the nut to the body using a wrench to the number of turns indicated in the table above.
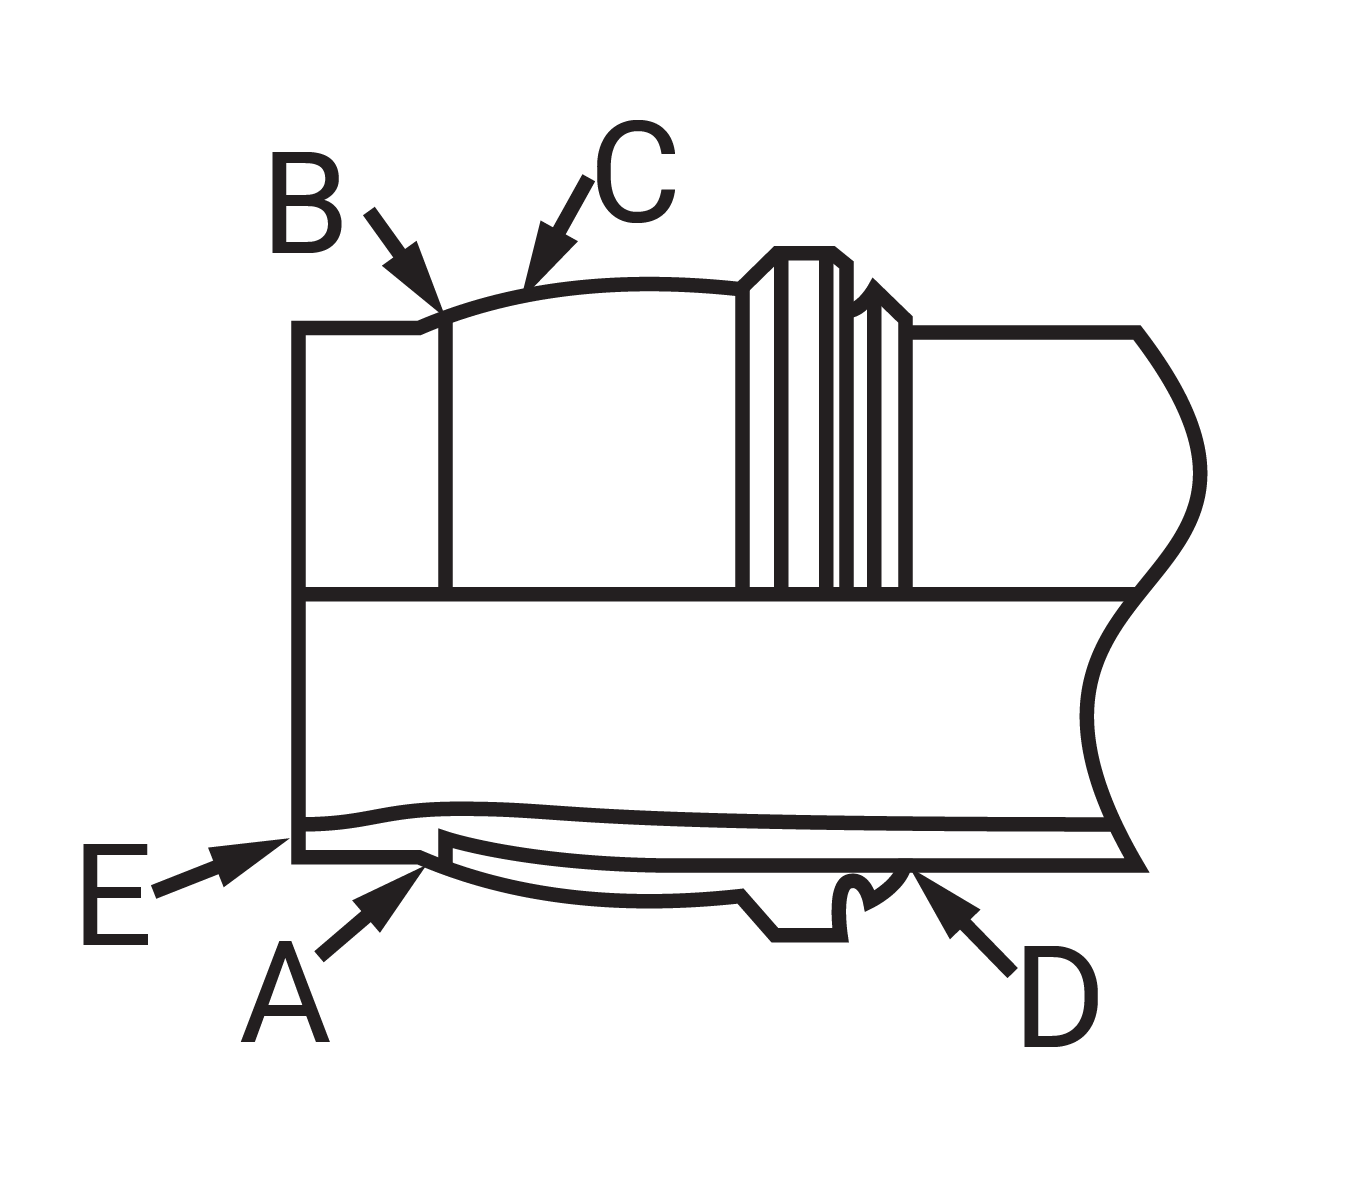
Inspecting the ferrule/sleeve set
Preset inspection for:
- Ridge raised to at least 50% of ferrule/sleeve thickness (A).
- Leading edge coined flat (B).
- Slight bow to remaining part of ferrule (C).
- Back end snug against tube (D).
- Slight indent around end of tube (E).
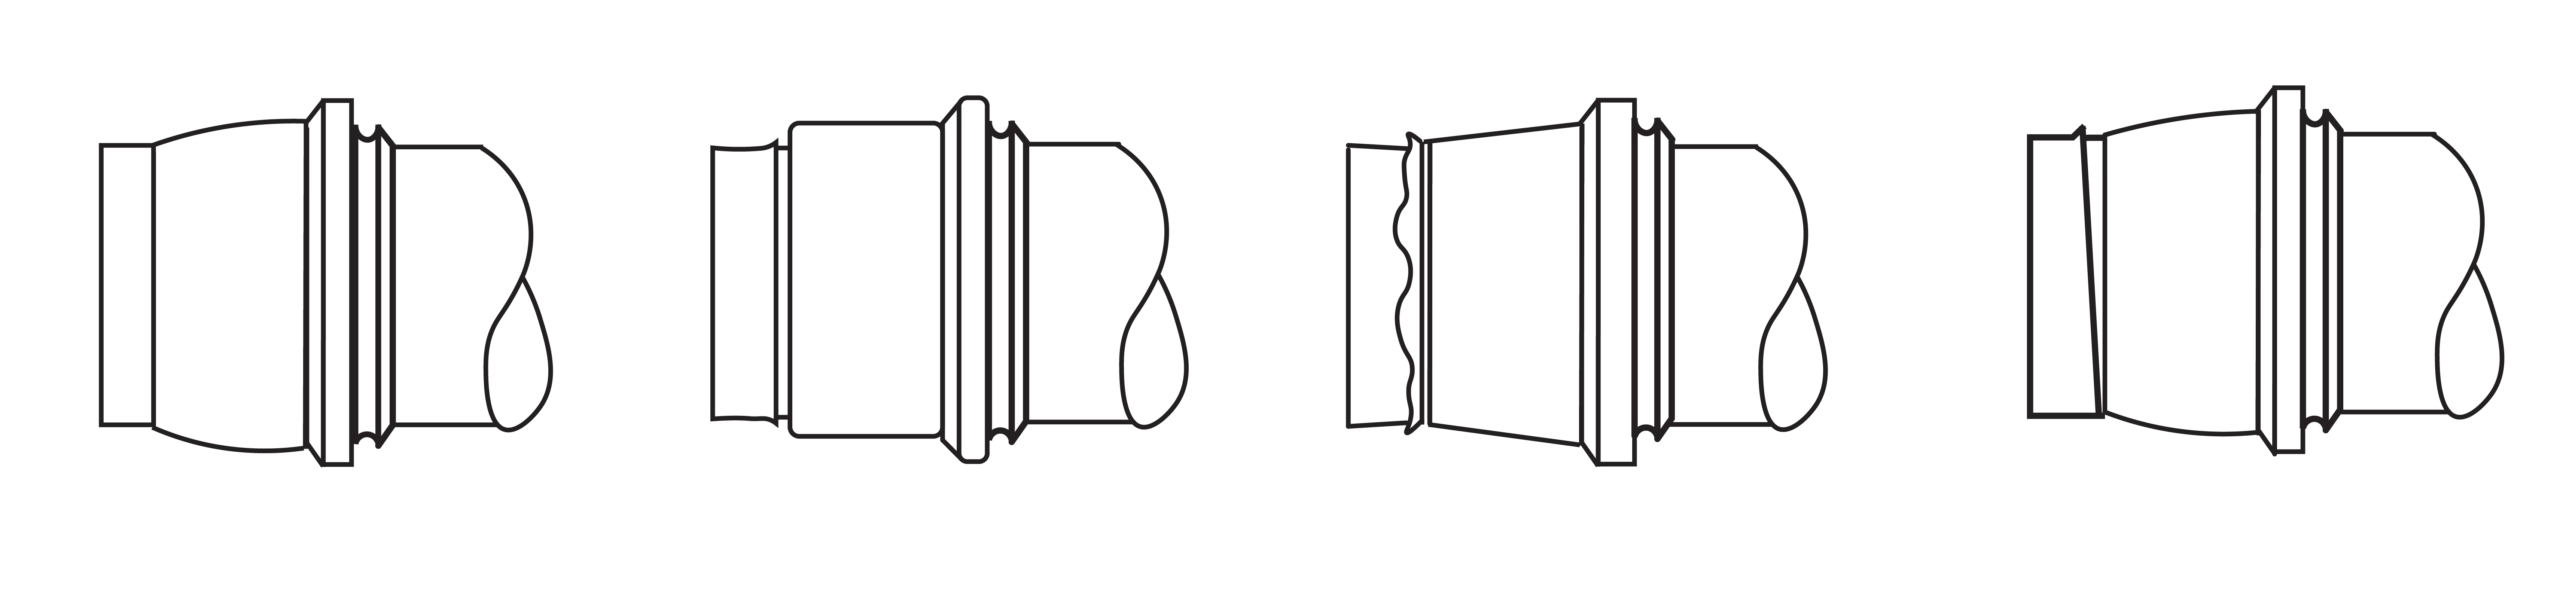
- The following illustrations show incorrect presets and their causes:
Leakage at flareless fitting can be caused by:
- Shallow bite.
- Overset ferrule/sleeve.
- Ferrule/sleeve cocked on tube.
- No bite.
Test Your Skills
1. What are the three causes for an incorrect ferrule set?
A. Tube incorrectly inserted, under torque, too much force.
B. Incorrect wrench size, bad ferrule, too much force.
C. Wrong ferrule size, mismatched nut, wall thickness.
D. Incorrect tube size, incorrect material, shallow bite.
E. Incorrect wall thickness, too much torque, shallow bite.
2. What are the three parts of a flareless fitting?
A. Tube, nut, and sleeve.
B. Nut, ferrule(s), and fitting body.
C. Ferrule bite, tube, and fitting body.
D. Tube, nut, and fitting body.
E. Ferrule, sleeve, and fitting body.
See Solutions
Share this information.
Related Posts


Sponsor

Sponsors